So with a little bit of effort you have crossed the Vim learning curve. You have gotten used to Vim but you are not able to get it to match the same level of productivity you get with something like VSCode. Well, the great thing about Vim is that it is highly customisable. So you can tweak it to function exactly how you want it to. Also, you can take advantage of the abundant plugin ecosystem the Vim community has built to extend the abilities of Vim.
By the end of this tutorial you will have learned the basics of Vim configuration, which include:
- Changing default options
- Mapping keys to do whatever you want
- Changing the default colorscheme
- Installing and configuring plugins
With the above, you will be ready to create your own highly personalised Vim set up that you can use to boost your productivity.
Note that we’ll focus on configuring Vim rather learning to use it.
Prerequisites
The purpose of this tutorial is to configure Vim to boost your productivity. However, it can have undesirable outcomes if you are just starting out with Vim. If that is the case, take some time to get familiar with the basics then come back and read this tutorial. The instructions assume basic familiarity with using command-line tools like curl and git.
Step 0: A first look at the vimrc file
Unlike a lot of IDEs which have a preferences screen which you can use to configure Vim. Generally this file is found inside your home directory. But if it does not exit, worry not. You can make one and Vim will find it.
There are multiple places Vim expects to find its configuration file. You can see a list of places and other information about your Vim by using this command:
$ vim --version
You should see something like this:
   system vimrc file: "$VIM/vimrc"
     user vimrc file: "$HOME/.vimrc"
 2nd user vimrc file: "~/.vim/vimrc"
      user exrc file: "$HOME/.exrc"
       defaults file: "$VIMRUNTIME/defaults.vim"
  fall-back for $VIM: "/usr/share/vim"
Although you can place the .vimrc file in your $HOME directory, placing it in the .vim directory is a more sustainable practice. Go to your home directory, and enter the following commands:
$ cd ~
$ mkdir -p ~/.vim # Make a .vim directory if it does not exist
$ vim ~/.vim/vimrc
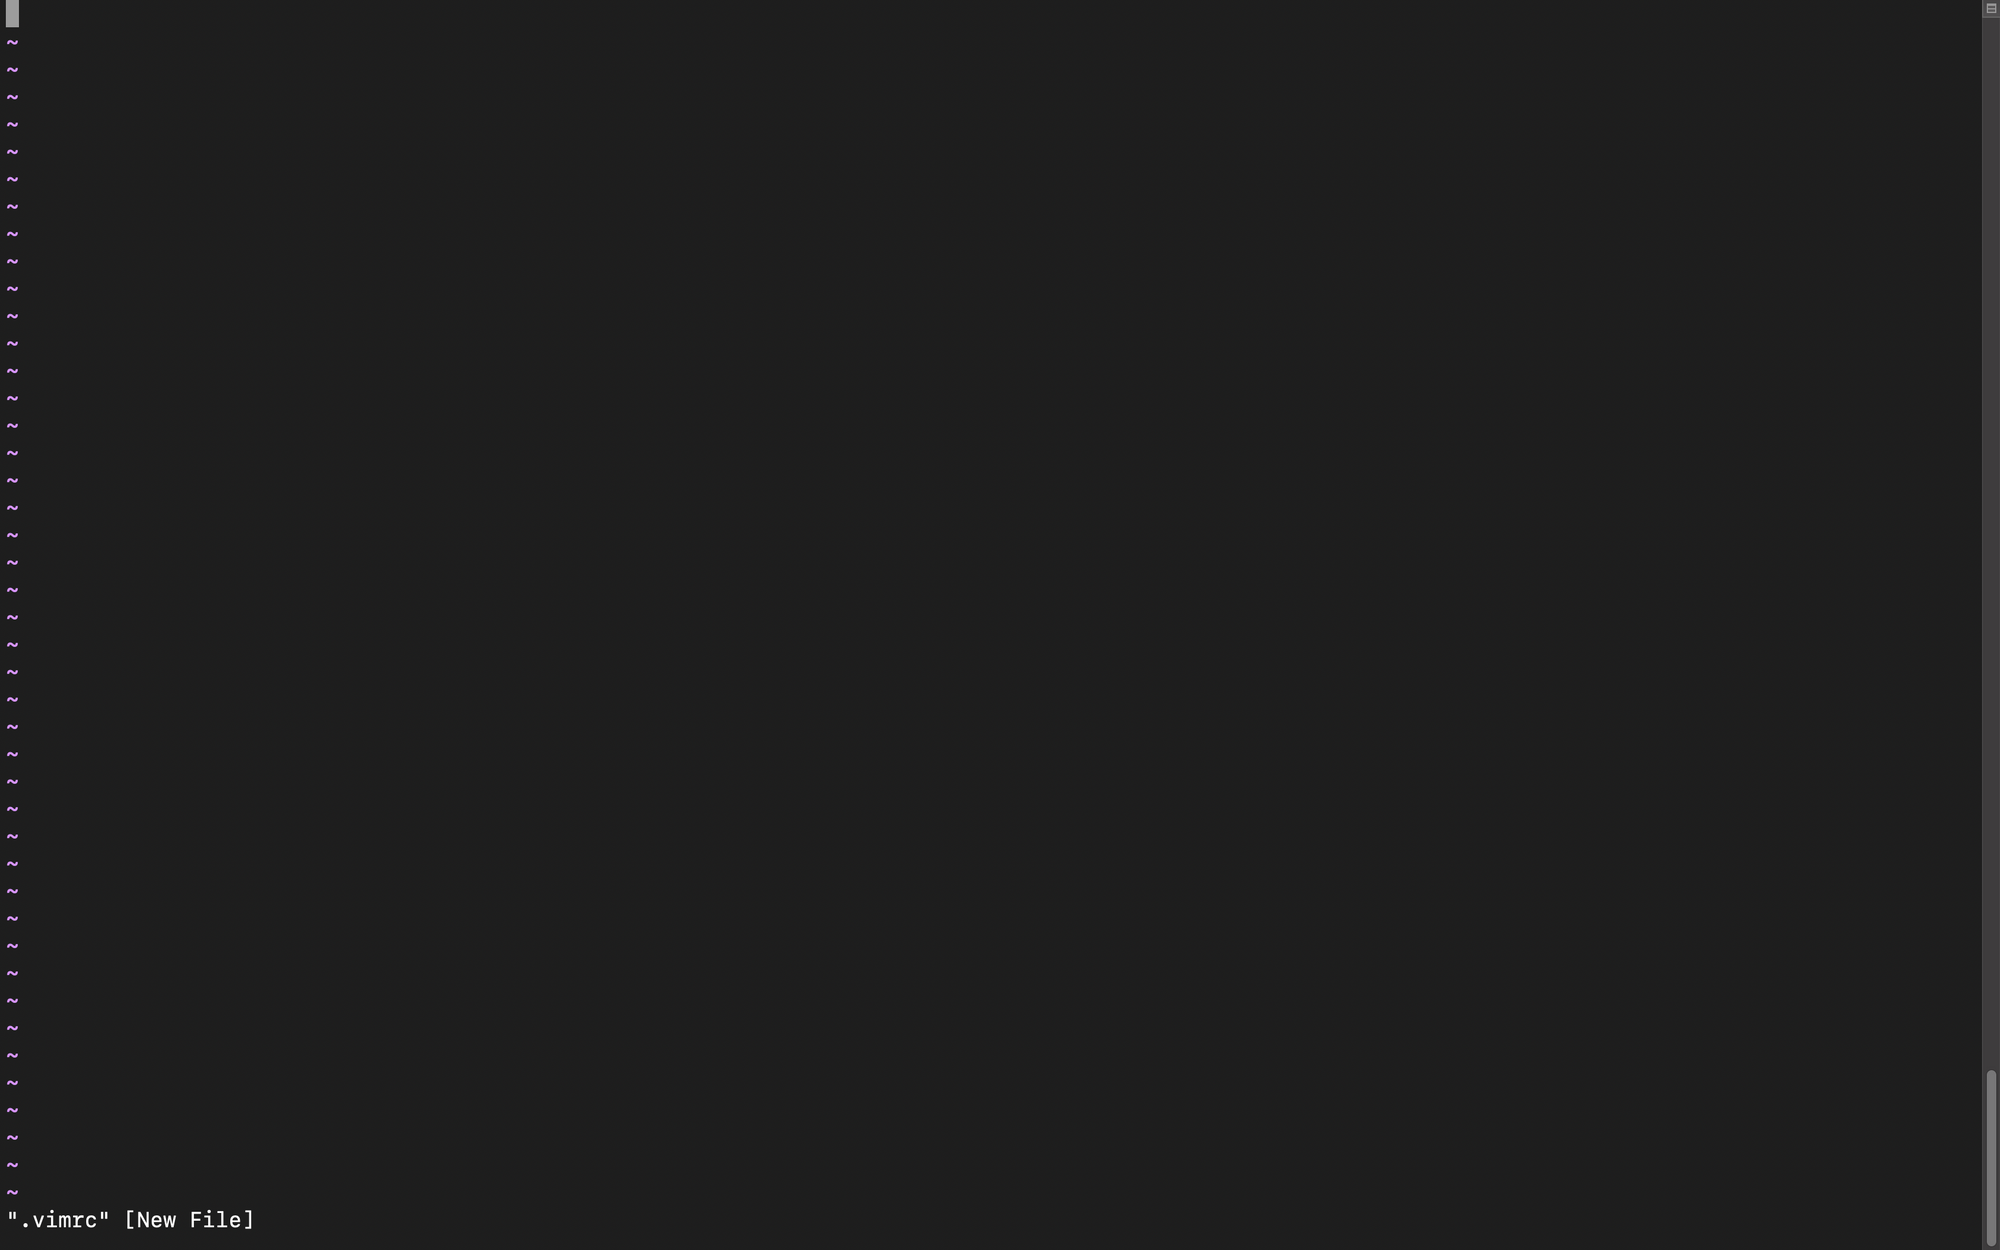
If this is your first time opening this file, you will probably see a blank file. And your Vim will look something like this:
 What is this? Where are all the options? Before you stare too long at this abyss, let’s start putting stuff inside this file. We will start with a few general settings first.
Step 1: The General Options
The defaults in Vim are great, but they are not for everybody. In this step, we will configure a few general options to make Vim more convenient to use.
Let’s begin by putting the following lines in your .vimrc file.
filetype indent on " Enable file-type specific indentation

filetype plugin on " Enable plugins
Syntax Highlighting
Vim supports syntax highlighting based on the file extension. Enable this by adding the following line:
syntax on
Setting the Title
The title option sets the title of the terminal window to the name of the file you are editing.
set title
Indentation
Next, we’ll add a few lines which make sure Vim indents files exactly how you want it to and what happens when you press TAB.
" Tab == 4 spaces
set tabstop=4 " Number of visual spaces per TAB.
set softtabstop=4 " Number of spaces per TAB while editing.
set expandtab " Expand to 4 spaces when you press TAB.
set smarttab " Navigate by a TAB's width.
set autoindent " Automatically indent lines while editing.
Numbering
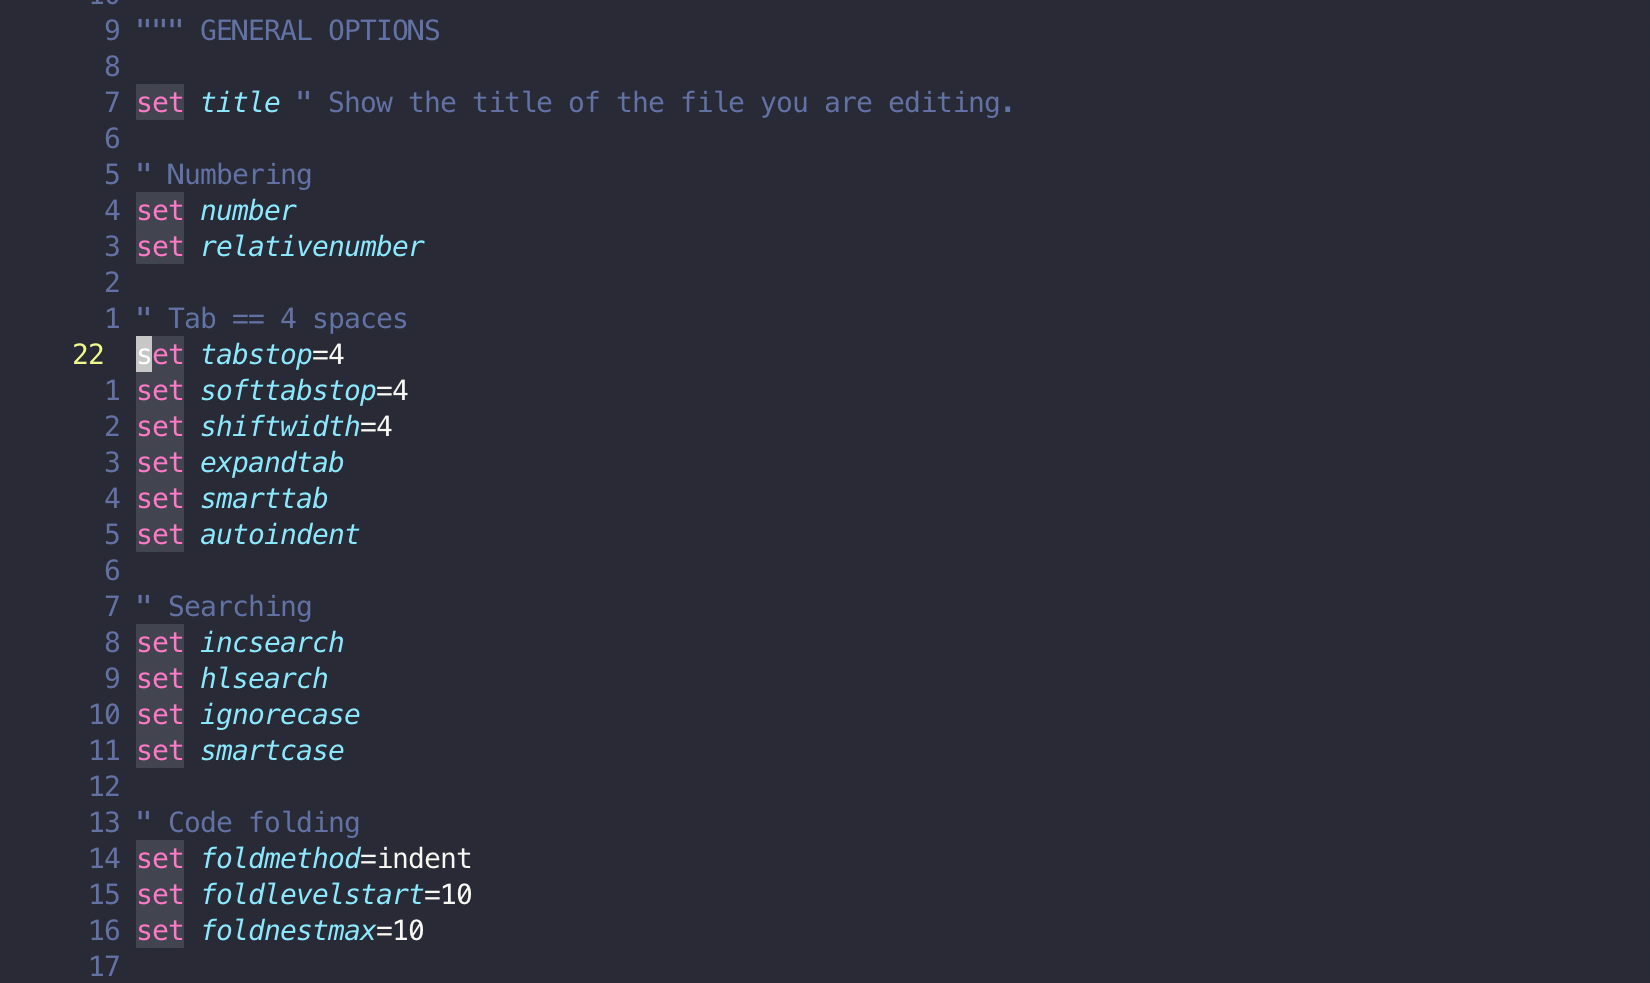
Relative numbering is another great Vim feature. It might take some time to get used to but once you do, it is another feature you cannot live without. Take a look at this:
 Vim tells me I am on line 22 and the distance of each line from the current line. Let’s say I want to copy until the
 set autoindent line. I simply use y5j without having to count the number of lines manually or using Visual mode.
To use relative numbering along with the line number, add the following lines:
" Numbering
set number " Show line number
set relativenumber " Show relative numbers
Code Folding
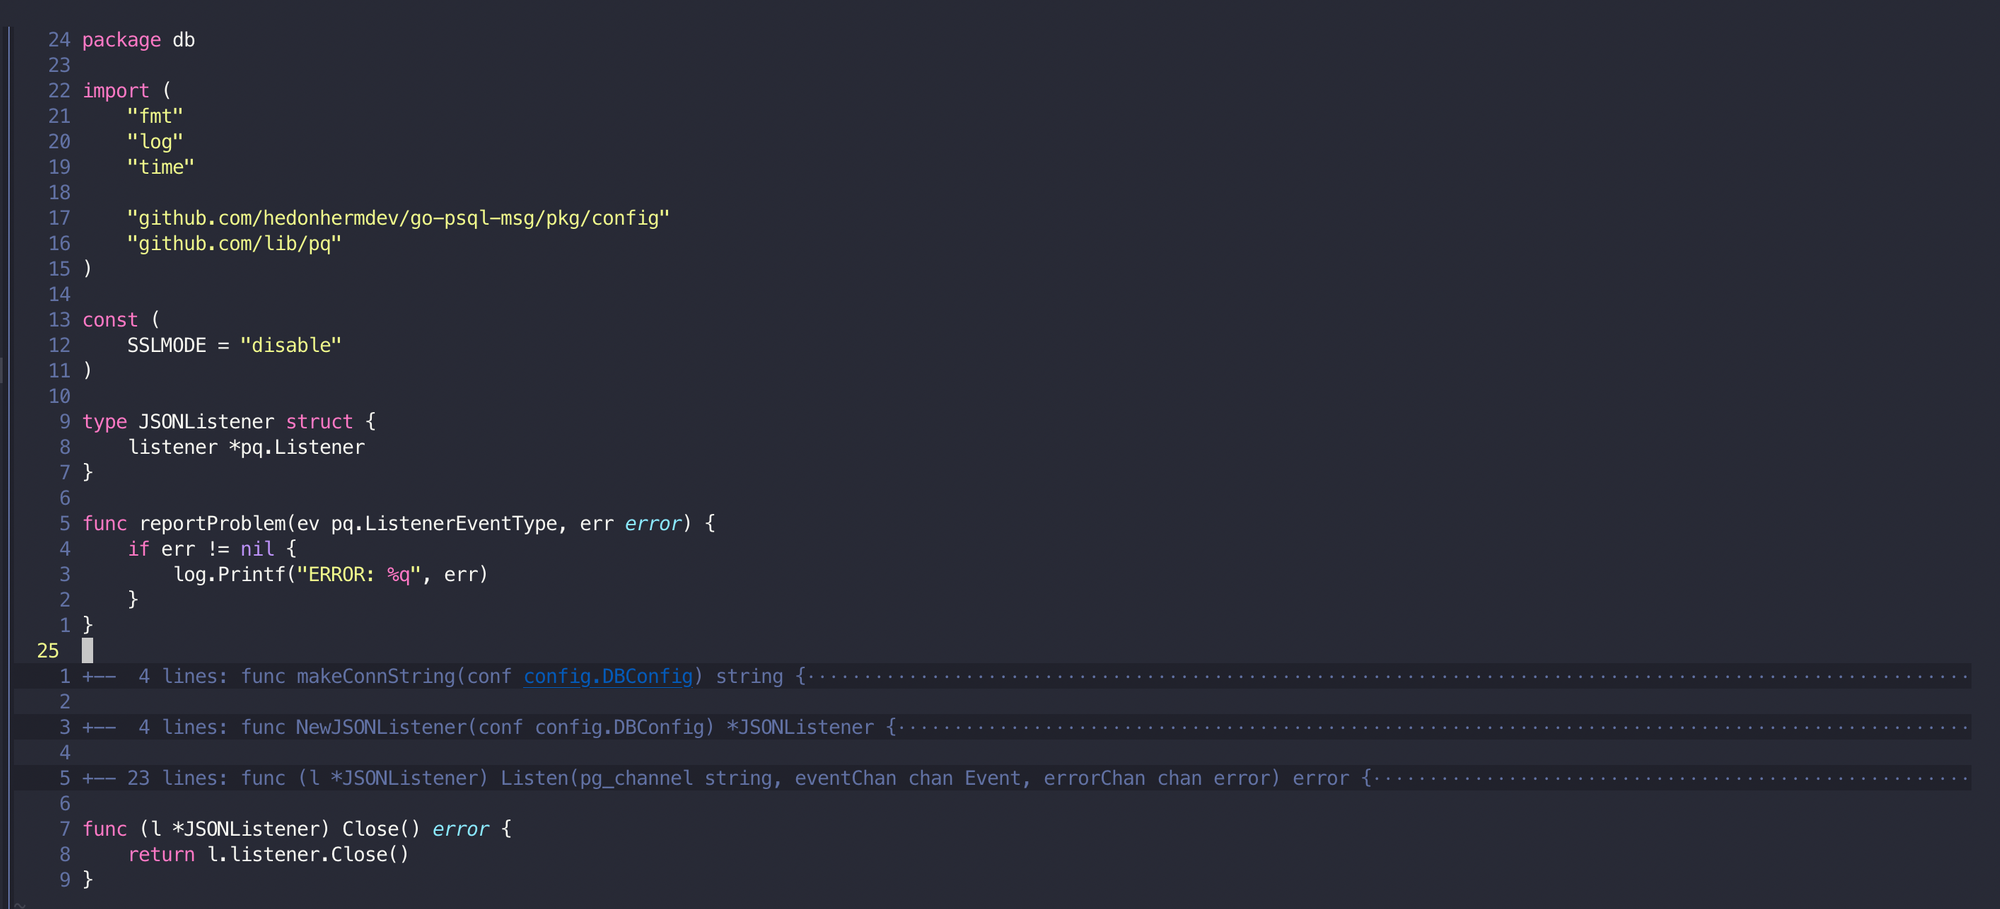
When you are editing files with long blocks of code, it can get pretty hard to navigate the file. You can use code folding to “fold” the irrelevant parts like this:
 The following configuration makes code folding better in Vim. I set the
 foldmethod to indent as almost all code I write is indented.
" Code Folding
set foldmethod=indent " Folding based on indentation.
set foldlevelstart=10 " Fold only long blocks of code.
set foldnestmax=10 " Folds can be nested, this ensures max 10 nested folds.
If you want Vim to automatically fold code when you open files, you can add the following line:
set foldenable
Splitting
Splits are a great feature of Vim. Later we’ll add settings to make navigating through splits even better.
" Splitting Panes
set splitright " Open a new vertical split on the right
set splitbelow " Open a new vertical split below.
Searching
Vim has great searching. But we can make it even better.
" Searching
set incsearch " Dynamically search while typing characters.
set hlsearch " Highlight occurences.
set ignorecase " Ignore case while searching with lowercase characters.
set smartcase " Check for case when using mixed case.
Setting both ignorecase and smartcase matches both HelloWorld and helloworld while searching with /hello but matches only HelloWorld while searching with Hello.
Swap Files
Swap files are annoying. I always save my files. The following options disable Vim’s backup feature. Add these lines only if you are sure you want that.
" Turn off swap files and backups.
set noswapfile
set nobackup
set nowritebackup
Wildmenu
With wildmenu you can get a menu of options for autocomplete in command mode like this:
 To use
 wildmenu add the following line:
set wildmenu " Wildmenu for autocomplete in command mode.
Just type part of the command and press TAB for the menu to show up and press TAB to move through the options.
Step 2: Keybindings
The great thing about Vim is that you can map keys or a combination of keys to anything and I mean anything. Be it another key or a command or a set of commands. I use the following keybindings to further customize Vim to suit me.
Switching To Normal Mode
I love using the HJKL keys for navigation in Vim because it lets me rest my fingers in the home row. But having to reach out to the key every time you want to switch back to Normal mode is ironic. This can get really annoying when you switch between modes *a lot. *A great option is to remap the Caps Lock key to ESC. But I prefer this:
" Switching back to normal mode
inoremap jk <esc>
We can interpret the above line as: Remap jk in insert mode to <esc>.
This lets you switch back to normal mode from insert mode by pressing the j and k keys consecutively. This might feel weird in the beginning but it is very convenient and time saving once you get used to it.
The Beginning and The End of a Line
By default, to go to the beginning of a line you can press ^ an $ to go to the end of a line. Unless you use a lot of regex, these can be obscure and hard to remember. I have remapped these to B and E respectively which are both closer to reach and easier to remember.
" Going to the end and the beginning of a line
nnoremap B ^
nnoremap E $
nnoremap $ <nop>
nnoremap ^ <nop>
<nop> means that the $ and ^ are no longer bound to anything.
Navigating Between Splits
The following four lines let you navigate between splits using Ctrl and the direction of the split. For example, to go a split on the right, you can press Ctrl+L.
" Navigating splits
nnoremap <C-J> <C-W><C-J>
nnoremap <C-K> <C-W><C-K>
nnoremap <C-L> <C-W><C-L>
nnoremap <C-H> <C-W><C-H>
Code Folding
By default you can trigger code folding by using za. I find this to be an awkward combination of keys. Instead I can use <space> in Normal mode.
nnoremap <space> za
Running Files
Most IDEs provide a Run button to run the current file you are editing. To set up something similar to that, I use the following configuration based on the filetype.
So for running a Python file:
autocmd filetype python nnoremap <buffer> <F5> :w<CR>:!clear;python %<CR>
autocmd is for running commands automatically on a certain event. Above we set up an autocmd for when the filetype is Python. So whenever we open a Python file, Vim remaps the <F5> key to the specified command which is: save the current buffer and then run the open file (%) with Python.
Similarly for Nodejs:
autocmd filetype javascript nnoremap <buffer> <F5> :w<CR>:!clear;node %<CR>
With the above two lines, you can press <F5> to run the file from inside Vim. This is really helpful for working with scripts. You can setup similar commands for Go, Rust, Ruby etc.
Step 4: Change The Colorscheme
Now that you have mastered some productivity, you do not want to be stuck with an ugly looking Vim forever. There are some excellent colorschemes made by the community. Personally, I prefer Nord because of the minimal contrast.
To install the colorscheme, first make a new directory for placing our colorschemes:
$ mkdir -p ~/.vim/colors # Make a directory for colorschemes
Next, download the colorscheme to the colors directory.
$ curl https://raw.githubusercontent.com/arcticicestudio/nord-vim/develop/colors/nord.vim -o ~/.vim/colors/nord.vim
Now, open your .vimrc and add the following line:
" Colors
colorscheme nord
You do not have to stick to Nord. Here’s a few other good colorschemes:
Step 3: Installing a Few Plugins
Vim has a great plugin ecosystem. There is a plugin for almost every task you can imagine. Before Vim 8, using plugin managers like vim-plug, Vundle or Pathogen was the custom. But since Vim 8, you can install plugins manually without a plugin manager. To begin, make the following directories in your .vim directory. The directory bundle can be named anything you like. We will place all our plugins in this directory.
$ mkdir -p ~/.vim/pack/bundle/
Inside this directory, make two directories called start and opt.
$ cd ~/.vim/pack/bundle
$ mkdir start
$ mkdir opt
The above two directories will be used to store plugins as follows:
startis used for plugins which you want to be enabled by default.optis for optional plugins you are experimenting with. These plugins can be enabled by using:packadd.
Installing Your First Plugin
As an example, we will install the vim-surround plugin by TPope. We’ll add this in the start directory. To begin, clone the git repository in your start directory.
$ cd start
$ git clone https://github.com/tpope/vim-surround
That’s it! Now, whenever you open Vim, the plugin will be loaded.
vim-surround is used for dealing with a pair of “surroundings” in Vim. For example, if you want to surround the current word with double quotes, use ysiw" or if you want to change single quotes to double quotes, use cs'". You can check out more features in the README.
Now that you know how to install a plugin, the following sections will describe a few plugins I use to get IDE like features in Vim. Each of these plugins is available on Github and you can install it by following the procedure we discussed above.
UI
scrooloose/nerdtree
NERDTree is a file explorer for Vim which you can use to browse through files and move, copy, delete files or directories. If you want little icons along with the filenames, you can add Plug 'ryanoasis/vim-devicons'. Here’s what it looks like:
 Note: if you want the file explorer to appear on the right you can add the following line in your vimrc:
let g:NERDTreeWinPos = "right"
vim-airline/vim-airline
Airline is described as a “Lean & mean status/tabline for vim that’s light as air.” When installed correctly, it will give you something like this:
 You can use it with
 Plug 'vim-airline/vim-airline-themes' to customise it even more.
Functionality
tpope/vim-commentary
You can use this one to quickly comment/uncomment lines. The general command is gc followed by an object. To comment the current line you can use gcc. Similarly, to comment until the end of the file, use gcG.
airblade/vim-gitgutter
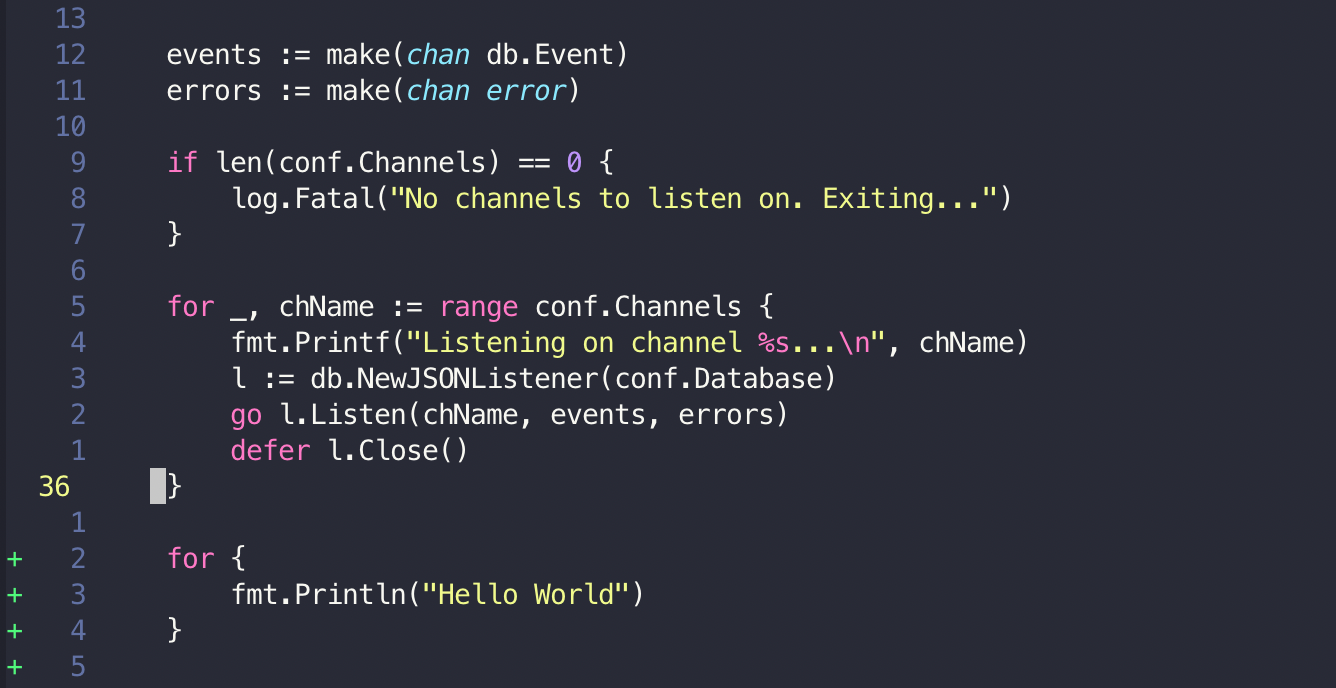
Gitgutter shows you which lines have been added or modified according to git diff in the sign column. It looks this:

christoomey/vim-system-copy
Yanking lines in Vim does not copy them to the system clipboard, this can be a disadvantage when you want to copy lines from an open file and paste them outside Vim. This plugin lets you do exactly that.
You can use cp followed by a text object to copy it to the system clipboard. For example, you can use cP to copy the current line. cp5j to copy till the next 5 lines.
Languages
These are a few language specific plugins I use for Vim:
sheerun/vim-polyglot
This is a language pack with support for 149 languages. It includes syntax highlighting, indentation for each language.
fatih/vim-go
The Go programming language plugin. Includes formatting on save, syntax highlighting, automatic imports and a lot more.
psf/black
Black is a code formatter for Python. This is their plugin. You can use :Black to format the current file you are editing. You can even set black as a pre-save command for Python files to autoformat your Python files everytime you press :w. To do this, add the following line.
autocmd BufWritePre *.py execute ':Black'
Bonus Tip
You can use Vim folds to split your configuration into easy to navigate sections like this:

Conclusion
With the above configuration and plugins, you are ready to become a Vim Ninja, more productive than ever. And you have a Vim you will never want to leave. From here, you can check out even more configuration options, make your own functions, change your colorscheme (or even write your own!). This is the reason I love Vim, you can make it work exactly the way you want it to.
The final vimrc file as described above is available here.
A few resources you can use to go further:
- This talk by Chris Toomey: [Mastering The Vim Language](https://www.youtube.com/watch?v=wlR5gYd6um0)
- More on Key Mapping: Modal Mapping
- Setting Up Autocompletion with Language Servers: Coc.nvim Note: There are quite a few autocompletion engines for Vim but I find Coc to be the simplest to set up. Getting it right can take some effort but it is worth it.
- Go Crazy With Colorschemes: Awesome Vim Colorschemes
- Although not covered in this post, the leader key in Vim can have quite a few uses: Leaders
- Learn more about Vim’s plugin directory structure: An overview of what belongs in each directory of a Vim plugin
- Take a look at r/vimporn for examples of ricing Vim
You can also take a look at my Vim configuration here. I use NeoVim, so some of the options might not work for you but you can find their equivalents for Vim.